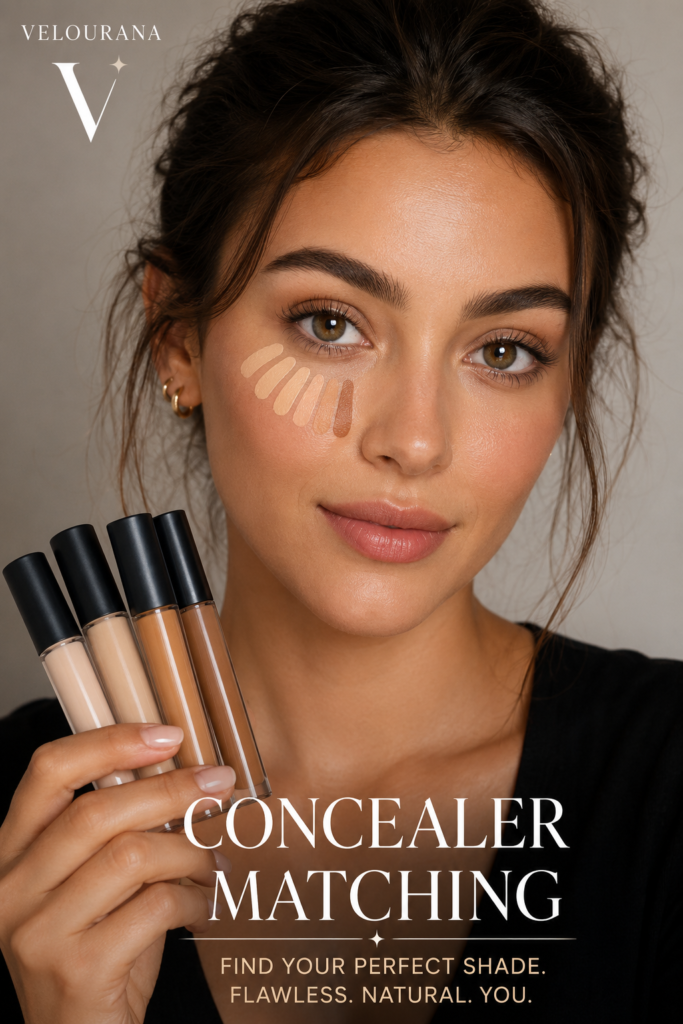
CATEGORY: Concealer Matching
Under-eye concealer is one of the most transformative products in a makeup routine, but it is also one of the easiest to mismatch.
A concealer that works beautifully on the rest of the face may look completely wrong beneath the eyes. A shade that seems perfect when swatched on the hand can suddenly turn gray when placed over dark circles. A product that looks bright and fresh in a tutorial may create an obvious pale band when applied to a different complexion.
The reason is simple: the under-eye area presents a different color-matching problem from ordinary skin.
You are not merely matching skin depth and undertone. You are also working with discoloration, facial shadows, thinner-looking skin, natural hollows, reflections of light and sometimes more than one color at the same time.
This means that successful under-eye concealer matching requires a slightly different approach.
The objective is not always to find the concealer closest to your skin tone. Sometimes the best result comes from a product that is subtly brighter. Sometimes you need a corrective undertone rather than a lighter shade. And sometimes the problem you are trying to conceal is primarily structural shadow rather than pigmentation.
Once you understand what is actually creating the darkness, choosing the right concealer becomes much easier.
Why Under-Eye Darkness Is Not One Single Color
The term “dark circles” makes it sound as though everyone is dealing with the same problem.
They are not.
Under-eye darkness can appear blue, violet, brown, gray, reddish, greenish or as a combination of several tones.
Some people have strong pigmentation beneath the eyes. Others have relatively little discoloration but deep tear troughs that create visible shadow. Some experience both.
Skin depth also changes how these colors are perceived.
Blue-purple darkness may be obvious on fair skin.
Brown or gray-brown pigmentation may be more prominent on medium or deep complexions.
On olive skin, the under-eye area can sometimes take on a muted green-gray or brown-gray appearance depending on the underlying coloration.
The correct concealer therefore depends partly on what you are actually seeing.
Before choosing a shade, examine the eye area without makeup in natural light.
Ask whether the darkness looks mainly blue, purple, brown, gray or simply shadowed.
That observation is the foundation of a better match.
Distinguish Pigmentation From Shadow
This is one of the most useful distinctions you can make.
Pigmentation is color that exists in the skin.
Shadow is created by facial structure and lighting.
If you gently change the angle of your face toward a window and the darkness shifts dramatically, part of what you are seeing may be shadow.
If the color remains clearly visible regardless of lighting, pigmentation probably contributes more strongly.
A hollow beneath the eye can cast a shadow that no amount of color correction will completely erase because the issue is three-dimensional.
Concealer can soften the appearance by brightening the recessed area, but it cannot physically change facial structure.
Understanding this prevents endless layering.
If the problem is mainly pigment, correction becomes important.
If the problem is mainly hollowing and shadow, strategic brightening may be more useful.
If both are present, you may need a combination of correction and brightness.
Start With Your Natural Skin Depth
Before deciding how much brighter the under-eye area should be, establish your actual complexion depth.
This gives you a reference point.
If you already have a foundation that matches well, use it as your guide.
For a natural under-eye result, the concealer usually needs to remain reasonably close to your overall complexion.
Moving slightly lighter can create brightness.
Moving dramatically lighter can create contrast.
That contrast may be intentional in certain makeup styles, but it is not the same as natural correction.
A common mistake is assuming that dark circles require the lightest concealer possible.
They do not.
The deeper the under-eye discoloration, the more likely a very pale concealer is to interact badly with the color beneath it.
Why Very Light Concealer Can Turn Gray
Gray under-eyes are often blamed on the product formula, but the real issue is frequently color interaction.
Imagine applying a pale beige concealer over a blue-purple area.
If the concealer does not fully cover or neutralize the underlying discoloration, some of the blue-purple remains visible through the lighter pigment.
Visually, the two combine.
The result can become gray or ashy.
This is particularly common when the concealer is much lighter than the complexion.
The same effect can occur over deeper brown pigmentation, especially on medium and deep skin tones.
The instinctive response is often to apply even more pale concealer.
That usually increases thickness without solving the underlying color problem.
A better solution is to neutralize the discoloration before trying to brighten it.
Brightening and Correcting Are Different Jobs
This distinction changes the entire way you approach under-eye makeup.
Correction is about neutralizing unwanted color.
Brightening is about making an area appear lighter.
These are not the same task.
If your under-eye area is strongly blue or purple, a peach or orange-based corrector may reduce that cool discoloration.
If the area is brown or gray-brown, the appropriate warm corrective tone may help reduce the dullness depending on skin depth and the exact color present.
Once the unwanted coloration has been softened, concealer can then bring the area into harmony with the rest of the complexion.
If desired, a slightly brighter shade can be used strategically afterward.
Trying to perform all three jobs with one very pale concealer is one of the main reasons under-eye makeup becomes heavy, gray or unnatural.
Choosing Peach Corrector for Fair to Light Skin
Peach is one of the most familiar corrective families for under-eye darkness.
On fair to light complexions, delicate peach or pink-peach tones can help counter blue and purple shadows without introducing too much orange.
The intensity matters.
A highly saturated orange corrector may be excessive on very fair skin because you would then need substantial concealer to cover the corrector itself.
A good corrector should make the darkness look reduced, not replace it with a vivid patch of another color.
Use very little.
Correctors are usually most convincing when the corrective pigment remains thin and targeted.
You are not attempting to paint the entire under-eye area peach.
You are applying enough warmth to the darkest sections to reduce the blue or violet quality beneath them.
Peach and Salmon on Light-Medium to Medium Complexions
As skin depth increases, slightly richer corrective tones may become more useful.
Peach, salmon and peach-orange shades can all work depending on the precise complexion and the color of the under-eye darkness.
Salmon is often used to describe a pink-orange family, while peach can range from soft yellow-peach to warmer orange-peach.
The terminology is inconsistent between brands.
Do not select a corrector purely by name.
Look at the actual pigment.
A medium neutral complexion with blue-purple darkness may respond beautifully to a moderate peach.
A medium golden complexion might prefer something warmer.
An olive complexion may require a more muted approach because overly saturated peach can become visibly orange against the skin.
Again, harmony is more important than the label.
Orange and Red-Orange Correction on Deeper Skin
Deeper complexions often require richer corrective pigments when under-eye discoloration is pronounced.
A very pale peach corrector may not provide enough contrast against strong blue, purple or gray discoloration.
Richer orange, burnt orange or red-orange tones can be more effective depending on the skin and the color being neutralized.
But stronger correction does not mean applying a thick orange layer.
The corrector should still be controlled.
The goal is to weaken the unwanted color sufficiently that a skin-toned concealer can finish the work without becoming cakey.
Corrective shades should also be proportional to the discoloration.
Someone with deep skin and mild under-eye darkness may not need an intense red-orange product at all.
Matching the strength of the corrector to the strength of the discoloration is just as important as matching it to complexion depth.
Brown Under-Eye Discoloration Needs Careful Evaluation
Not all dark circles are predominantly blue or purple.
Brown pigmentation may respond differently.
If the darkness is warm brown, adding a strongly orange corrector may not provide the same dramatic effect that it would against blue.
If the brown has a gray or cool component, controlled warmth can still be useful.
This is why examining your under-eye color matters more than following a universal chart.
Sometimes a warm-toned concealer with sufficient coverage works better than a separate corrector.
Sometimes targeted correction is still valuable.
The test is the result.
If the area becomes more even without obvious residual grayness or visible orange, your color choice is working.
How Much Lighter Should Under-Eye Concealer Be?
For natural makeup, slightly lighter is usually enough.
One shade step lighter than your complexion can often provide noticeable brightness without creating a stark contrast.
The exact difference depends on the brand because shade intervals are not standardized.
A concealer only marginally lighter may already provide sufficient lift if it has a radiant finish.
An extremely matte concealer may look more obvious even when the depth difference is small.
If you enjoy a sculpted or high-contrast makeup style, you may deliberately choose a brighter shade.
That is a stylistic decision rather than a matching necessity.
For everyday under-eye concealing, the most flattering result often comes from keeping the difference subtle.
Why Two Shades Lighter Is Not a Universal Rule
Beauty advice sometimes suggests choosing concealer one or two shades lighter than foundation.
The phrase sounds precise, but “one shade” does not have a universal meaning.
One brand may have tiny increments between neighboring shades.
Another may jump significantly in depth.
Undertones may also change from one shade to the next.
You could move two shades lighter and accidentally move from neutral-golden to cool-pink.
This is why visual comparison is more reliable than counting shade numbers.
Choose the amount of brightness that looks appropriate on your complexion rather than following an arbitrary numerical rule.
Match the Undertone to Both Skin and Discoloration
Under-eye concealer undertone is often slightly more flexible than spot-concealer undertone.
A facial concealer is usually chosen to disappear into the surrounding skin.
An under-eye concealer may benefit from a little more warmth because warmth can help counter cool shadows.
For example, someone with a neutral complexion may prefer a neutral-peach under-eye concealer even if their exact facial match is more purely neutral.
This does not mean everyone should choose warm concealer.
If your under-eye area has little blue or purple discoloration, a strongly peach product may look unnecessarily orange.
If your complexion is cool, an excessively golden concealer may create obvious contrast.
The goal is to find the point where complexion harmony and correction overlap.
Fair Skin and Under-Eye Brightening
On fair complexions, even a small difference in depth can look dramatic.
This is because there is less room to move lighter before the concealer becomes nearly white.
A shade that appears only slightly brighter in the tube may create a much more obvious effect on the face.
Fair skin can also show blue and violet discoloration prominently because the contrast is greater.
This creates an important paradox.
The temptation is to choose a very pale concealer because the darkness looks strong, but strong darkness may actually require better correction rather than greater brightness.
A soft peach corrector followed by a concealer close to the natural complexion can often look fresher than a very pale opaque shade applied alone.
Medium Skin and Under-Eye Matching
Medium complexions often have a wide range of viable concealer shades, but undertone becomes especially important.
A concealer can easily appear too yellow, too pink or too peach depending on the skin’s natural balance.
Medium olive skin can be particularly difficult because many standard medium concealers contain obvious orange or golden undertones.
For natural under-eye brightness, look for a shade that lifts slightly without becoming disconnected from the cheeks.
If correction is required, keep the corrective tone concentrated where darkness is strongest rather than spreading warmth across the entire eye area.
This makes the finished result more dimensional and less likely to appear flat.
Deep Skin and the Risk of Ashiness
On deep complexions, choosing an excessively pale concealer can create a pronounced gray or chalky effect.
This happens because the product is both too light and often insufficiently corrective for the darkness beneath it.
The contrast between a very pale under-eye and the rest of the complexion can also become visually abrupt.
Brightening does not require abandoning the natural richness of the skin.
A concealer moderately lighter than the complexion can create beautiful illumination while preserving harmony.
For pronounced dark circles, correct first with an appropriate warm tone and then select a concealer that restores the skin rather than attempting to bleach the appearance of the under-eye area.
Olive Skin and Under-Eye Concealer
Olive skin creates its own matching challenges.
A concealer that looks beautifully peach on someone else may appear intensely orange against an olive complexion.
Neutral shades can sometimes look pink.
Golden shades can become too yellow.
For olive skin, muted concealer undertones can be particularly useful.
Neutral-olive, olive-golden or softly peach-olive combinations may integrate better than strongly saturated warm tones.
If using a peach corrector, apply very little and keep it only where the blue or violet discoloration exists.
The more of the natural olive complexion you leave visible, the easier it is to maintain harmony.
Your Under-Eye Area May Need More Than One Shade
Dark circles are rarely perfectly uniform.
You may have deep blue-purple darkness near the inner corner, a brownish area farther outward and a hollow that creates shadow below both.
Using one thick layer of concealer across the entire region treats all those problems as though they were identical.
A more precise approach can produce a more natural result.
Use correction only where discoloration exists.
Use a skin-matching concealer where coverage is needed.
Use a brighter concealer only where structural shadow benefits from additional light.
This may sound more complicated, but it often requires less total product because each shade is performing a specific job.
The Inner Corner Often Needs the Most Attention
For many people, the deepest darkness appears near the inner corner of the eye and alongside the bridge of the nose.
This area can make the entire face look more tired even when the rest of the under-eye region is relatively even.
Instead of applying a large triangle of concealer, try concentrating pigment in the inner corner and blending outward.
If that area has blue or purple discoloration, a tiny amount of corrective warmth can be particularly effective.
Strategic placement often produces more brightness than applying a thick layer everywhere.
The Tear Trough Should Be Treated Differently From the Whole Under-Eye
The tear trough is the hollow that can extend from the inner eye downward and outward.
Because it is recessed, it catches less light and creates shadow.
Applying bright concealer directly into the deepest part of the hollow can reduce the visual contrast.
Covering the entire surrounding area with the same brightness may eliminate the benefit because everything becomes equally light.
For structural shadow, precision matters.
Think of concealer as manipulating light rather than simply covering color.
Do Not Automatically Conceal to the Lash Line
Many people apply concealer from the lower lashes all the way down across the under-eye.
That may be appropriate if discoloration extends throughout the region, but it is not always necessary.
Applying heavy concealer directly beneath the lower lashes can emphasize fine lines and make the eye area look flatter.
If the skin close to the lashes already looks relatively even, leave some of it visible.
Conceal where the darkness is strongest.
Natural variation around the eyes often looks more youthful than a completely opaque mask.
Formula Changes the Way a Shade Appears
Two concealers with identical apparent color can look different after application because their formulas reflect light differently.
A radiant concealer may make the under-eye area appear brighter even without being much lighter than the skin.
A matte concealer can look deeper or flatter because it reflects less light.
A very opaque product produces stronger visible pigment.
A sheer product allows more natural skin color to show through.
This means shade selection cannot be separated entirely from finish and coverage.
If you switch from a luminous medium-coverage concealer to an opaque matte one, you may discover that your usual degree of brightness suddenly looks too pale.
Hydration Can Affect the Visual Result
Dry under-eye skin can make concealer appear less seamless.
When product gathers around fine texture or dry patches, it catches light unevenly.
This can make even a well-matched shade look obvious.
Hydrated skin usually allows concealer to spread more evenly and appear closer to natural skin.
However, excessive skincare underneath can cause the product to move or separate.
The ideal preparation depends on your skin and formula.
The key point is that apparent shade mismatch is sometimes partly a texture problem.
Before abandoning a concealer color, consider whether the finish rather than the shade is making it stand out.
Test Concealer on the Under-Eye, Not Only the Hand
The hand is useful for comparing shades next to one another.
It is not an accurate simulation of the under-eye area.
Your hand may be deeper, warmer, cooler or more tanned than your face.
More importantly, it does not contain the same discoloration.
A concealer that looks perfect on your hand may turn gray over blue under-eye darkness.
Another shade that appears slightly peachy on the hand may become beautifully neutral once placed beneath the eyes.
For this reason, the final decision should always be made where the product will actually be used.
Let the Concealer Set Before Judging
Some concealers deepen or change undertone as they dry.
A fresh under-eye application may look perfectly bright only to become warmer or darker after several minutes.
The reverse can also happen when a creamy product initially appears heavy but settles into the skin.
Do not judge immediately.
Apply a thin layer, allow it to set and inspect the final color in natural light.
If you are testing several shades, give all of them equal settling time.
Compare Both Eyes When Testing
Testing different shades under each eye can be extremely useful.
Apply one candidate beneath the left eye and another beneath the right.
Then step away from the mirror.
Which side looks more rested?
Which side integrates better with the cheek?
Which side looks less gray?
Which one creates brightness without obvious contrast?
This comparison is often much easier than evaluating isolated swatches because you can see the effect on the entire face.
Do not focus exclusively on whether the product technically covers more.
The best concealer is the one that improves the overall balance.
Why Camera Makeup Can Mislead You
Under-eye concealer often appears much brighter in photographs and videos than it does in person.
Studio lighting, ring lights, exposure adjustments, beauty filters and image processing can all change the apparent depth of complexion products.
A dramatic brightening technique that photographs beautifully under controlled lighting may look stark in ordinary daylight.
This does not make the technique wrong.
It simply means its purpose is different.
Choose your under-eye match according to how and where you expect to wear the makeup.
For everyday natural light, subtle harmony is usually more forgiving.
For photography or stage makeup, stronger contrast may be intentional.
Be Careful With Bright Setting Powder
Sometimes the concealer itself is correctly matched, but the finished under-eye turns pale or gray after powder is applied.
Translucent powders are not always truly invisible on every complexion.
Some contain enough white pigment to create an ashy cast, especially when applied heavily.
Brightening powders can also alter the apparent color of the concealer.
If your under-eyes look good before powder and wrong afterward, the problem may not be the concealer shade.
Test the concealer alone before changing it.
Corrector Can Also Become Too Heavy
Color correction is useful, but it can be overdone.
Too much corrector creates another layer that must be covered.
This increases product thickness and can make the under-eye area look textured.
The ideal corrector should reduce discoloration with the least amount of pigment possible.
Apply a very small quantity directly to the darkest area.
Blend softly.
Then evaluate.
If the darkness already looks significantly reduced, stop.
You do not need to make the skin look perfectly neutral before applying concealer.
Should Concealer Match Foundation Exactly?
It can, especially if your goal is extremely natural coverage.
A foundation-matching concealer can work beautifully beneath the eyes when discoloration is mild.
However, many people prefer a slightly brighter under-eye.
That is entirely reasonable.
The important distinction is that slightly brighter does not mean dramatically lighter.
If you use correction underneath, a complexion-matched concealer may actually appear naturally luminous because the darkness is no longer pulling the area visually downward.
Sometimes correcting the color creates more brightness than changing the shade.
Using a Skin-Matched Concealer First
One effective strategy is to begin with a concealer close to your actual skin depth.
Apply it over the corrected under-eye area.
Then assess the result.
If you still want more brightness, add a tiny amount of lighter concealer only to selected points such as the inner corner or deepest part of a hollow.
This approach gives you much more control than starting with an extremely pale concealer everywhere.
It also reduces the risk of grayness because the main layer remains connected to your complexion.
When a Slightly Deeper Concealer Can Help
Although under-eye concealer is usually discussed in terms of brightening, a slightly deeper or warmer shade can sometimes be useful as an initial correcting layer.
This is especially relevant when a very light concealer turns ashy over pronounced discoloration.
A warmer shade closer to the depth of the pigmentation may neutralize more effectively.
A brighter shade can then be added selectively.
The final appearance can be lighter even though the first layer was not.
How to Fix Concealer That Is Too Light
If your concealer looks too pale, you do not necessarily need to discard it.
Mixing it with a deeper concealer from the same formula can create a more suitable depth.
You can also reserve it for tiny highlighting points rather than using it across the entire under-eye.
If the product looks gray because it is too light over discoloration, adding a corrective layer underneath may help.
However, if the concealer is dramatically lighter than your complexion, mixing is usually more successful than attempting to force it to work alone.
How to Fix Concealer That Is Too Dark
A slightly dark concealer can sometimes work as a corrective base when it has a useful undertone.
You can then add a lighter shade selectively.
If it is simply too dark and does not provide any corrective benefit, mixing with a lighter companion shade is more straightforward.
Avoid spreading a dark concealer broadly beneath the eyes in an attempt to blend it away.
This can create visible shadows and make the area appear more tired.
How to Fix Concealer That Is Too Yellow
A yellow under-eye concealer can look unnatural on cool or neutral skin.
If the depth is otherwise correct, mixing with a more neutral or slightly cooler shade may solve the issue.
If it is also too light, the yellow becomes even more conspicuous.
Compare the concealer against your foundation and cheek area.
You want the transition from eye to face to look deliberate but harmonious.
How to Fix Concealer That Is Too Peach or Orange
Peach undertones can be useful for correction, but too much warmth can create visible orange under-eyes.
If your concealer looks orange, first determine whether the warmth is performing a corrective function.
If the darkness has disappeared but the area remains slightly warm, a thin layer of neutral concealer may balance it.
If the orange is obvious even after blending, the shade is probably too saturated or too deep.
Olive complexions are especially likely to encounter this issue.
Moving toward neutral, neutral-olive or more muted peach shades may provide a better result.
Your Ideal Match Can Change With the Seasons
Just like foundation, under-eye concealer may need adjustment throughout the year.
Summer tanning can deepen the face enough that your winter brightening concealer becomes too pale.
Winter skin can make a summer shade appear dull or too deep.
Keeping two neighboring shades can provide flexibility.
Mix them during transitional periods rather than purchasing a new product every few weeks.
Your corrective undertone may remain similar even when the final concealer depth changes.
Natural Under-Eye Makeup Requires Restraint
The most natural under-eye result usually comes from using less product than expected.
Correct only where necessary.
Conceal only where necessary.
Brighten only where necessary.
This preserves the natural variation of the face.
When every millimeter beneath the eye is covered with the same thick, pale shade, the area can become visually flat.
Skin is not naturally one uniform color.
Allowing some variation to remain makes the makeup more believable.
Step Back From the Mirror
Close-up mirrors encourage perfectionism.
At extreme magnification, every line, shadow and tiny patch of pigmentation becomes significant.
But other people do not see your face from five centimeters away.
After applying concealer, step back to normal conversational distance.
Look at the entire face.
Does the eye area look more rested?
Is the brightness balanced?
Can you see an obvious pale semicircle?
Does one eye look grayer or warmer than the other?
These questions are more useful than whether every tiny shadow has been erased.
Think in Terms of Balance, Not Erasure
Dark circles do not always need to disappear completely.
Trying to remove every trace of natural darkness can require so much product that the result looks less flattering than the original skin.
The goal is often balance.
Reduce enough discoloration that the eye area looks refreshed.
Brighten enough shadow that the face appears more open.
Maintain enough natural variation that the skin still looks like skin.
This is where excellent concealer matching differs from simply choosing maximum coverage.
Build a Simple Under-Eye Concealer System
You do not need a large collection.
A practical system might consist of one corrective shade and one concealer close to your complexion.
If you enjoy additional brightness, a second lighter concealer can be useful.
This gives you three independent controls.
The corrector manages color.
The complexion concealer manages coverage.
The brighter shade manages light.
Because each product has a clear purpose, you can use smaller quantities of all of them.
The Perfect Under-Eye Match Is Not Always the Lightest One
The most important lesson in under-eye concealer matching is that brightness and lightness are not identical.
A properly corrected under-eye can appear brighter even when the concealer itself is close to your natural complexion.
A very pale concealer can appear dull if the blue, purple or brown beneath it remains unresolved.
A luminous formula can create more visual lift than a lighter matte shade.
Strategic placement can brighten the face more effectively than covering the entire eye area.
Start by understanding your darkness.
Determine whether you are seeing pigmentation, shadow or both.
Identify the dominant colors.
Select correction only when necessary.
Then choose a concealer that harmonizes with your complexion rather than attempting to overpower it.
If you want additional brightness, add it gradually and selectively.
A successful under-eye match should make the area look rested, balanced and connected to the rest of your face.
It should not create a mask.
It should not turn gray.
And it should not require you to sacrifice the natural depth and undertone of your complexion in the pursuit of brightness.
When the color, depth and placement are working together, under-eye concealer stops looking like a corrective layer and begins to look like naturally refreshed skin.
The End
Velourana
 Discover More From Our Family of Websites
 ZodiacBearing (Astrology, Tarot, Numerology, Angel Numbers & Spiritual Guidance)
 Velourana (Beauty, Makeup, Hair Care, Skincare & Beauty Tips)
 HavenBearing (Home, Living, Organization, Décor & Everyday Inspiration)
 PawBearing (Pet Care, Dog Breeds, Animal Health, Training & Pet Products)
 PsyCatherine (Notes From the Journal of a Psychologist on Real Life)