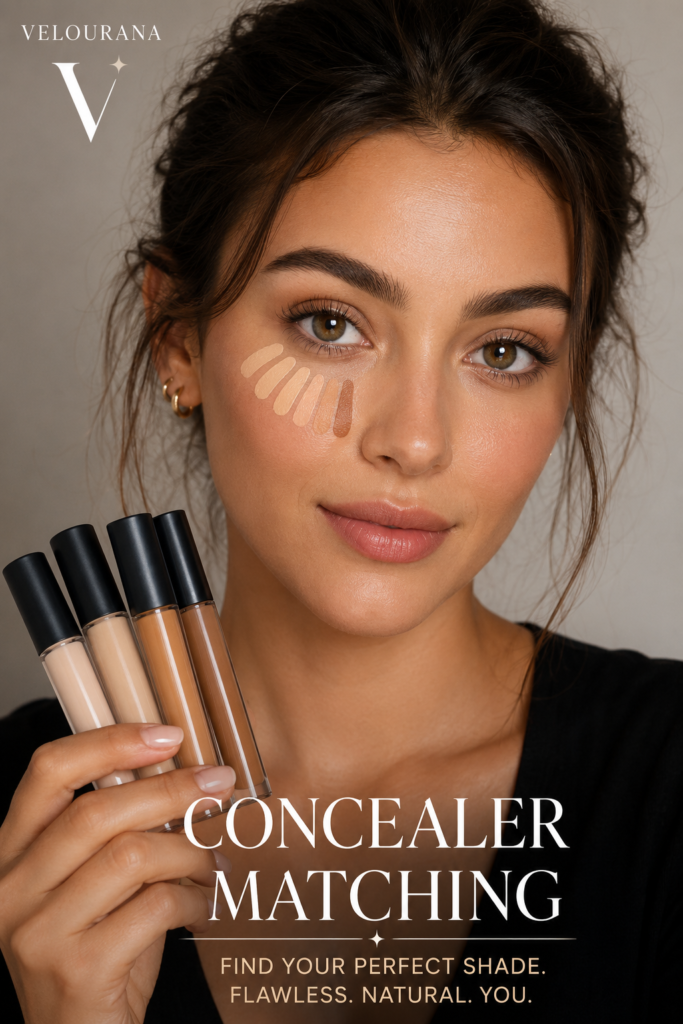
CATEGORY: Concealer Matching
Concealer is often described as a simple corrective product: place it over a blemish, dark spot or area of redness and the imperfection disappears.
In practice, spot concealing is much more precise than that.
The difficulty is not merely covering the discoloration. The real challenge is making the covered area blend into the surrounding complexion so naturally that the concealer itself does not become more noticeable than what it was meant to hide.
A concealer can provide excellent coverage and still fail visually if the shade is too light, too dark, too warm, too cool or too saturated. A product with the wrong texture can also create a visible patch even when the color is technically close.
This is why matching concealer for blemishes, redness and dark spots requires a slightly different approach from matching concealer beneath the eyes.
Under-eye concealer is often allowed to be brighter.
Spot concealer usually is not.
When you are disguising a blemish or pigmentation mark, the objective is generally camouflage rather than illumination. You want the corrected area to merge into the surrounding skin instead of standing out as a lighter or more polished island.
The best spot concealer is therefore not necessarily the prettiest shade in the tube.
It is the shade that disappears.
Why Spot Concealer Should Usually Match Your Skin More Closely
One of the most common mistakes in concealer matching is using the same bright under-eye concealer everywhere on the face.
That can work when the shade is only slightly lighter than the complexion and the coverage is sheer.
But with a full-coverage formula, a lighter concealer placed over a blemish often creates a pale dot.
The blemish may technically be covered, but the eye is still drawn to the area because the new color does not match the surrounding skin.
For spot concealing, you generally want the product to sit extremely close to your natural complexion depth.
If you wear foundation, the concealer should usually harmonize with the foundation after it is applied.
If you wear no foundation, it should blend into your bare facial skin.
This is different from under-eye makeup, where a small amount of additional brightness may be intentional.
With blemishes, the ideal result is usually invisibility.
Depth Comes First
Before worrying about undertone, determine the correct depth.
Depth refers to how light or dark the concealer appears compared with your complexion.
A product that is much lighter than the skin will create a highlighted spot.
A product that is too dark can create a shadow or muddy patch.
This is particularly noticeable when the concealer has high opacity.
A sheer formula can tolerate a slightly imperfect depth because more of your natural skin color remains visible underneath.
A full-coverage concealer replaces more of the visible skin color with its own pigment, making an inaccurate match easier to detect.
When choosing a spot concealer, start by finding a group of shades that sit very close to your overall complexion depth.
Then refine by undertone.
Undertone Determines Whether the Concealer Belongs
Once the depth is approximately correct, undertone becomes critical.
A concealer can be the right lightness and still look unmistakably wrong.
If your complexion is golden and the concealer is strongly pink, the concealed area may look rosy.
If your skin is neutral-cool and the concealer is heavily yellow, the corrected spot may become golden.
If you have olive undertones and the concealer contains a lot of peach, it may turn orange even though its depth is almost perfect.
This is why matching purely by lightness is insufficient.
The concealer must belong to the same general color family as the surrounding complexion, unless you are deliberately using it as a corrective layer.
Concealing Blemishes Is Different From Concealing Redness
A blemish often contains several visual elements at once.
There may be redness around the lesion.
There may be a darker center.
The surface may be raised.
The surrounding skin may be dry or textured.
No concealer shade can physically flatten a raised blemish.
That is an important limitation.
Makeup can reduce the color contrast, which makes the blemish less noticeable, but light will still hit raised texture differently from flat skin.
For this reason, the goal should be realistic.
You are trying to reduce attention to the blemish, not erase its three-dimensional structure.
A very thick layer of concealer may actually emphasize the raised surface even while covering the redness.
Redness Requires More Than Simply Going Lighter
Redness often tempts people to choose a paler concealer.
The logic seems reasonable: if the area is darker or more intense, perhaps a lighter color will neutralize it.
But lightness does not directly neutralize redness.
If the concealer lacks enough coverage or the correct undertone, the red pigment may show through and combine visually with the lighter product.
The result can become pink, chalky or uneven.
A concealer close to your actual skin depth generally provides a more natural result.
If the redness is strong enough that the skin-toned concealer cannot cover it without becoming heavy, a small amount of green corrective pigment may help.
Green Corrector and Redness
Green is commonly used against red because the colors oppose one another in traditional color theory.
But the goal is not to make the skin green.
A green corrector should be used sparingly.
Apply only where redness is pronounced.
Blend a very thin layer.
Then place your skin-toned concealer over it.
The corrector reduces the intensity of the red so the concealer does not need to work as hard.
This can be particularly useful around inflamed blemishes or localized redness.
However, mild redness often does not require a separate corrector.
A well-pigmented concealer with the correct undertone may be enough.
Adding unnecessary corrective layers can make the final makeup thicker than it needs to be.
Match the Corrector Intensity to Your Skin Depth
Just as concealer depth matters, the depth and saturation of a corrector matter too.
A very pale mint-green corrector may work adequately on a fair complexion but look ashy on deeper skin.
A strongly saturated green corrector may create more work than necessary on light skin because it then needs to be completely covered.
The best corrective shade is strong enough to reduce the discoloration but subtle enough to disappear beneath a thin layer of complexion product.
Correction should simplify the makeup, not create another problem to conceal.
Active Blemishes Need a Different Approach From Healed Marks
An active blemish may be red, raised and textured.
A healed post-blemish mark may be flat and brown, purple, red or gray.
These situations should not automatically be treated the same way.
For active redness, the main task is often reducing red contrast while preserving a natural finish over texture.
For a flat dark mark, the main task may be neutralizing excess depth or pigment.
Because a flat mark has no raised surface, makeup can often camouflage it more convincingly than an active blemish.
The color strategy should therefore depend on the actual mark rather than the word “blemish.”
Brown Dark Spots Need Depth Matching
Dark spots and hyperpigmentation are especially prone to turning gray when concealed incorrectly.
A common mistake is placing a very light concealer directly over a dark brown mark.
The mark may still show through the pale pigment.
Instead of disappearing, the two colors combine visually and create a gray or ashy patch.
This is particularly noticeable on medium and deep complexions.
The solution is not necessarily more concealer.
It may be a closer skin match, stronger opacity or subtle color correction before the concealer.
Why Hyperpigmentation Can Show Through Full Coverage
Even full-coverage concealer can behave unpredictably over dark pigmentation.
Coverage is not only about opacity.
The color beneath the makeup affects how the final surface appears.
A concealer may look opaque in the tube but still allow some underlying color influence once it is blended into a thin layer.
This is why a dark spot may continue to look slightly gray, purple or brown despite repeated application.
Adding more of the same incorrect shade can lead to a thick patch.
A better approach is to neutralize the underlying color before adding the final complexion match.
Peach and Orange Correction for Dark Spots
Warm correctors such as peach, orange and red-orange can help counter certain dark discolorations, especially those with blue, purple or gray components.
The appropriate depth depends on both the complexion and the pigmentation.
Fair skin generally requires softer corrective tones.
Medium skin may benefit from peach or richer peach-orange shades.
Deep complexions may require deeper orange or red-orange correction for pronounced discoloration.
Again, these are guidelines rather than universal rules.
The corrective tone should reduce the darkness without becoming visible through the final concealer.
Correcting Around the Mouth
Pigmentation around the mouth can be particularly difficult because the surrounding skin often contains natural color variation.
The corners of the mouth may appear darker.
The upper lip area can contain shadow or pigmentation.
Applying a very pale concealer over the entire area can create a conspicuous light ring.
Instead, work selectively.
Correct the darkest sections only if necessary.
Then use a concealer that matches the surrounding complexion closely.
The goal is to soften contrast, not make every part of the face identical in color.
Concealing Post-Inflammatory Marks
Post-inflammatory marks can remain after a blemish has healed.
Depending on skin tone and the type of discoloration, the mark may appear red, pink, purple, brown or gray-brown.
A red mark may require a different strategy from a brown one.
Pink-red marks can often be covered successfully with a skin-matching concealer, sometimes assisted by subtle green correction if the redness is strong.
Brown or gray marks may respond better to controlled peach or orange correction depending on their undertone.
Do not treat every post-blemish mark with the same corrector.
Look at the actual color.
The Best Test Is Whether the Corrected Area Disappears
When you test a spot concealer, do not simply ask whether it covers the mark.
Ask whether the area becomes less noticeable overall.
This is a more demanding test.
A concealer can completely hide the original discoloration yet still create a visible patch because the shade or texture is incorrect.
Stand back from the mirror.
If your eye is still immediately drawn to the concealed area, investigate why.
Is it too light?
Too dark?
Too warm?
Too pink?
Too matte?
Too shiny?
Too thick?
Sometimes the problem is color.
Sometimes it is finish.
Matching Concealer to Foundation
If you wear foundation, your spot concealer should be chosen in relation to the finished foundation shade rather than bare skin alone.
This matters because foundation may slightly change the overall tone of your face.
A concealer that matches bare skin perfectly may look too warm or too deep once foundation is applied.
The easiest strategy is often to apply your usual foundation first and then test concealer directly over it.
A well-matched spot concealer should blend into the surrounding base with minimal effort.
You should not need to spread it across a large area simply to disguise the edge.
Concealer Without Foundation Requires Greater Precision
When you wear concealer alone, the shade match becomes less forgiving.
There is no foundation around the concealed area to unify the complexion.
Every dot of product must blend directly into bare skin.
For this reason, concealer-only makeup often looks best when the product matches extremely closely.
Use a small brush or fingertip to place pigment directly over the mark.
Keep the strongest coverage in the center.
Blend only the perimeter.
If you blend the entire application aggressively, you may remove the coverage from the exact place where it is needed.
Why Blending Too Far Creates Visible Patches
Many people apply a small amount of concealer and then blend it over a large area.
This can actually make the match more obvious.
The original blemish may occupy only a few millimeters, but the concealer ends up covering several centimeters of skin.
Now any difference in undertone, depth or finish is spread across a larger region.
Precision reduces this problem.
Apply product where the discoloration exists.
Feather the edge only enough to merge with the surrounding skin.
The smaller the corrected area, the easier it is to make the makeup invisible.
Use the Smallest Tool That Works
A large sponge can be excellent for foundation, but it may be too broad for precise spot concealing.
Small brushes provide greater control.
A fine synthetic brush can place pigment directly over a tiny mark without disturbing the surrounding base.
A fingertip can also work well for certain creamy formulas because warmth helps soften the product.
The tool should match the size of the area.
Precision is one of the reasons professional spot concealing can look so natural even when relatively opaque products are used.
Let Concealer Sit Before Blending
Some concealers become more opaque if allowed to sit briefly before blending.
Applying a small amount, waiting a short period and then softening the edges can provide better coverage than immediately spreading the product.
This can reduce the amount of product required.
However, the exact timing depends on the formula.
Very fast-setting concealers may become difficult to blend if left too long.
The goal is simply to avoid thinning the product unnecessarily over the center of the discoloration.
Full Coverage Requires Better Color Accuracy
High-coverage concealers are powerful because they can hide strong discoloration with very little product.
But opacity makes color mistakes more visible.
A sheer concealer allows some of your natural complexion to show through, which can soften a minor undertone mismatch.
A full-coverage product places a stronger block of pigment over the skin.
This means a shade that is slightly too yellow, pink or orange can become obvious.
When choosing an opaque spot concealer, spend more time on precise shade matching.
Matte Finishes Can Emphasize a Mismatch
Matte concealers are often preferred for blemishes because they can remain in place and reduce shine.
However, an extremely matte patch can become visible on naturally luminous skin even when the shade is correct.
The difference in finish creates contrast.
Conversely, a very dewy concealer placed over a blemish can reflect light and emphasize texture.
An ideal finish often sits reasonably close to the surrounding skin or foundation.
You can adjust the finish slightly with powder, but it is easier to begin with a formula that already behaves similarly to the rest of your base.
Powder Can Change the Final Shade
Setting powder may alter the appearance of spot concealer.
A pale translucent powder can create an ashy cast on deeper skin.
A yellow-toned powder can make neutral concealer look warmer.
A heavily applied powder may also create a dry patch that catches light differently.
When evaluating a concealer match, check both before and after your usual setting routine.
If the shade looks correct before powder but wrong afterward, the powder may be the issue.
Dry Blemishes Need Less Product, Not More
Dryness makes concealer more visible.
A healing blemish may have flaky skin around it.
Applying a thick layer of full-coverage product can settle around the flakes and exaggerate their edges.
The temptation is often to add more product because the texture looks uneven.
That usually makes the problem worse.
Use as little product as possible.
Choose a formula that does not become excessively dry.
The objective is to reduce color contrast without creating a crust of makeup around the blemish.
Raised Blemishes Cannot Be Completely Hidden
Color correction has limits.
A raised blemish catches light and casts small shadows.
Even if you match the color perfectly, the texture remains.
Trying to completely erase it with layers of concealer can actually make the surface more obvious.
The best result often comes from reducing the redness and leaving the texture relatively natural.
From normal conversational distance, reducing the color difference can make the blemish significantly less noticeable even though it is still physically present.
Dark Spots Are Often Easier Than Raised Blemishes
Flat pigmentation has no three-dimensional structure.
This makes it much easier to camouflage with makeup.
Once the color is neutralized and the concealer matches the surrounding complexion, there may be very little visual evidence of the mark.
This is where precise correction can be particularly effective.
Use a corrector only if necessary.
Then add a skin-toned concealer.
Keep the product localized.
The result can be extremely convincing because there is no texture casting additional shadow.
Freckles Should Not Necessarily Be Concealed
Concealer matching also involves deciding what not to cover.
Freckles and natural pigmentation create variation that can make skin look dimensional.
Covering every visible freckle may require much more product and make the complexion appear flat.
If you enjoy your freckles, leave them visible.
Spot conceal only what you personally want to reduce.
There is no requirement for the face to become uniformly one color.
Concealing Acne Scars
Acne scars can involve both color and texture.
Some scars are flat but pigmented.
Others are indented or raised.
Flat discoloration can be corrected similarly to other dark spots.
Indented scars create shadows that may remain visible even after color correction.
A slightly reflective formula can sometimes soften the appearance of shallow depressions, while very matte heavy coverage may emphasize texture.
Again, makeup can alter color and light.
It cannot physically fill every scar.
Concealing Broken Capillaries and Localized Redness
Small visible red vessels or localized redness may be covered effectively with highly pigmented concealer.
For tiny areas, a separate green corrector is often unnecessary.
A carefully matched full-coverage concealer applied with a small brush may provide enough neutralization on its own.
If redness is widespread, however, applying spot concealer to every tiny section becomes inefficient.
A sheer color-correcting base or foundation may be more practical, followed by spot concealer only where additional coverage is needed.
Foundation First or Concealer First?
For most spot concealing, applying foundation first can be efficient because the foundation may already reduce much of the discoloration.
You can then see exactly where additional coverage is necessary.
This prevents over-application.
If you are using a color corrector, the corrector is often placed before foundation or concealer so it can neutralize the color underneath.
There are exceptions depending on formula and technique, but the general principle is useful:
Correct color first if necessary.
Apply your base.
Then conceal what still remains visible.
Why Concealer Sometimes Separates Over Blemishes
A perfectly matched shade can still become visible if the formula separates.
Blemishes may produce more oil than the surrounding skin.
Skincare or acne treatments can also change the surface.
If the concealer slides away from the center of the blemish, the redness begins to show through while pigment gathers around the edges.
This creates a ring-like effect.
Using thinner skincare underneath, allowing products to absorb before makeup and choosing a compatible concealer formula can help.
A small amount of powder may also improve longevity when appropriate.
Shade Matching Changes When You Tan
A spot concealer that disappears perfectly during winter may look pale in summer.
This is particularly obvious because spot concealer is designed to match closely.
If your complexion changes significantly with sun exposure, keeping two depth options can be useful.
You may use the deeper one in summer and the lighter one in winter.
During transitional seasons, mix the two.
If both shades have compatible undertones and the same formula, this can provide a very precise seasonal match.
Redness Can Make Your Face Seem Cooler Than It Is
People with facial redness sometimes assume they have a cool undertone because their cheeks appear pink.
But redness is not necessarily undertone.
If you choose a strongly pink concealer to match inflamed skin, the product may look wrong once the redness is covered.
Look at calmer areas of the complexion, the jaw and neck when identifying your underlying tone.
The concealer should match the skin you want the corrected area to resemble, not the discoloration itself.
Hyperpigmentation Can Make Your Face Seem Warmer or Deeper
Similarly, brown or reddish pigmentation can alter your perception of skin depth.
If you match concealer directly to a dark spot, you may choose a product that is too deep for the surrounding complexion.
Instead, identify the color of normal skin beside the mark.
That is usually the shade the final concealed area needs to become.
Correction handles the discrepancy between the dark spot and surrounding skin.
Do Not Match Concealer to the Blemish
This sounds obvious, but it is an important principle.
A red blemish does not require a red concealer.
A brown spot does not require a brown concealer of the same depth.
The final concealer should generally match the surrounding healthy skin.
Corrective products may be used underneath to neutralize the unusual color.
Think of the process as converting the blemish back toward your normal complexion rather than matching the makeup to the blemish itself.
Test Several Shades Side by Side
When possible, compare two or three concealers at approximately the same depth.
Apply small swatches close to the jaw or another representative area.
Allow them to dry.
One may become obviously yellow.
Another may appear pink.
A third may seem almost invisible.
That nearly invisible shade is often the strongest spot-concealing candidate.
Do not choose based on which shade looks prettiest on its own.
Choose based on which shade attracts the least attention on your skin.
Natural Daylight Reveals Undertone Errors
Artificial lighting can hide color differences.
Warm bathroom lighting may make a yellow concealer appear normal.
Cool retail lighting can distort pink or olive tones.
When evaluating a spot concealer, look at it in indirect daylight.
You should not see a colored halo around the concealed area.
If the product looks correct indoors but orange outside, trust the daylight comparison.
Give the Concealer Time to Dry Down
Many formulas deepen or warm slightly as they set.
A shade that looks perfect when first applied may become too dark several minutes later.
This is especially problematic for spot concealing because even a small depth change can create a visible mark.
Swatch the concealer.
Wait.
Then compare.
Always match the final dried shade, not the fresh liquid color.
Spot Concealer for Very Fair Skin
Very fair complexions can make small shade differences appear significant.
There is limited room to go lighter before concealer becomes visibly pale.
Undertone also becomes important because small amounts of yellow, peach or pink pigment may be obvious.
Choose a shade extremely close to the surrounding skin.
If redness is strong, a subtle green corrector may allow you to use less concealer and preserve a natural finish.
Spot Concealer for Medium Skin
Medium skin often spans a broad undertone range including golden, neutral, peach and olive.
A concealer that is the correct depth can still become visibly orange or yellow if its undertone is too saturated.
Olive medium skin can be particularly sensitive to peach-heavy products.
Test multiple undertones at the same depth and look for the one that disappears.
For dark spots, controlled peach correction may help if grayness develops beneath ordinary concealer.
Spot Concealer for Deep Skin
On deep complexions, concealers that are too light can create obvious ashiness.
This is especially common when correcting dark spots.
Choose a shade that genuinely matches the surrounding complexion rather than using your brighter under-eye shade.
If the pigmentation is very dark or cool-toned, orange or red-orange correction may be useful depending on the color present.
The final concealer should restore the natural richness of the complexion rather than creating a pale patch.
Spot Concealer for Olive Skin
Olive skin frequently exposes undertone problems.
Many concealers contain peach or pink pigment that becomes visible against muted olive complexions.
If standard warm shades look orange and standard neutral shades look pink, explore olive or neutral-olive options.
For redness, use green correction carefully because olive skin already contains greenish undertones.
The corrector should neutralize redness without making the area look gray or overly green.
Build a Dedicated Spot-Concealing Shade
If you regularly use concealer for blemishes or pigmentation, it is worth owning a shade specifically for that purpose.
Your under-eye concealer may be too bright.
Your highlighting concealer will almost certainly be too light.
A dedicated spot shade should closely match your finished complexion.
It may not look dramatic in the tube.
That is a good thing.
Its job is not to brighten.
Its job is to disappear.
One Concealer Can Still Work for Multiple Purposes
You do not necessarily need several products.
If your dark circles are mild and you prefer natural makeup, one complexion-matched concealer may work both under the eyes and on blemishes.
The eye area can be brightened through placement and finish rather than a dramatically lighter shade.
However, if you enjoy strong under-eye brightness, keeping a separate spot-concealing shade is usually more effective.
Mixing Concealers for a Better Spot Match
Two neighboring shades can be mixed to create a more precise match.
This is useful when your complexion changes seasonally or when a brand does not offer your exact depth.
Mixing products from the same formula is easiest because the textures and setting behavior are already compatible.
You can also adjust undertone slightly by mixing a warmer and more neutral version of a similar depth.
Keep the adjustment controlled.
If you need to mix several radically different colors every morning, another shade may ultimately be more practical.
How to Know Your Spot Concealer Is Too Light
The clearest sign is a visible pale dot where the blemish used to be.
You may technically no longer see the redness or pigmentation, but the area still attracts attention.
This is especially obvious in photographs.
A concealer that is too light can also make raised texture appear more prominent because brighter areas visually advance.
Move closer to your actual complexion depth.
How to Know It Is Too Dark
A dark concealer creates a shadow-like patch.
On flat hyperpigmentation, the corrected spot may still appear dirty or muddy even though the original mark is covered.
If you are using the concealer over foundation, compare the area directly with the surrounding base.
A spot shade should not deepen the complexion locally.
How to Know It Is Too Warm
Warmth can appear as yellow, peach or orange depending on the formula.
If you conceal a blemish and notice a golden or orange dot, the depth may be correct but the undertone is not.
Try a more neutral, olive or cooler variation depending on your complexion.
Do not automatically move lighter.
Undertone and depth are separate variables.
How to Know It Is Too Cool
A cool mismatch often appears pink or rosy.
On warm or olive skin, this can be especially visible.
If a “neutral” concealer repeatedly looks pink, that brand’s neutral family may simply be cooler than your complexion.
Experiment with neutral-warm, golden-neutral or olive alternatives.
The Final Check Should Be the Whole Face
After spot concealing, resist the temptation to inspect each area only through a magnifying mirror.
Step back.
Look at the full complexion.
Are your eyes drawn to the concealed blemish?
Can you identify exactly where the product begins and ends?
Does the texture look more obvious than before?
If the corrected area no longer attracts attention, the technique is working.
The goal of spot concealing is not microscopic perfection.
It is visual quietness.
Concealer Matching Is About Reducing Contrast
A blemish is noticeable because it contrasts with surrounding skin.
It may be redder, darker, lighter or more textured.
Concealer works by reducing that contrast.
This is a useful way to think about the entire process.
You do not necessarily need to erase every trace of the original mark.
You only need to reduce the difference enough that the eye stops focusing on it.
That often requires less makeup than expected.
Less Product Can Produce Better Camouflage
Heavy coverage is not always better coverage.
A thin, highly pigmented layer can look more natural than several thick coats.
When a concealer is accurately matched, you can often use very little because the product does not need to overpower the surrounding skin.
Correct the specific color problem when necessary.
Choose a concealer close to your natural depth and undertone.
Keep the product localized.
Then leave it alone.
Repeatedly adding and blending can turn an elegant correction into a visible patch.
The Best Spot Concealer Looks Like Nothing
The most successful blemish concealer is rarely the one that creates the brightest, smoothest or most dramatic transformation.
It is the one that becomes difficult to locate after application.
The redness is reduced.
The dark spot is softened.
The surrounding complexion remains natural.
There is no obvious pale dot, orange patch or dry ring.
This is why precise shade matching matters so much.
For blemishes, redness and dark spots, begin with the surrounding skin rather than the discoloration itself.
Match your complexion depth closely.
Choose an undertone that harmonizes with your natural coloring.
Use correction only when the underlying color is strong enough to require it.
Keep coverage targeted.
Allow texture to remain realistic.
When the concealer is correctly chosen and carefully placed, the eye stops noticing both the original mark and the makeup used to cover it.
That is the real objective of spot concealing.
Not perfection.
Disappearance.
The End
Velourana
 Discover More From Our Family of Websites
 ZodiacBearing (Astrology, Tarot, Numerology, Angel Numbers & Spiritual Guidance)
 Velourana (Beauty, Makeup, Hair Care, Skincare & Beauty Tips)
 HavenBearing (Home, Living, Organization, Décor & Everyday Inspiration)
 PawBearing (Pet Care, Dog Breeds, Animal Health, Training & Pet Products)
 PsyCatherine (Notes From the Journal of a Psychologist on Real Life)